

Always En Vogue
Acrylic Nails: 10 Signs It’s Time for A New Set

I understand that many of us want to look good for ourselves and save as much time and money as we can wherever we can whilst doing so. However, seeing long yellowing, cracking and peeling natural nails under acrylics can be off-putting to others especially if you work in hospitality or are present anywhere where hygiene is important. This is one of the main reasons for this listicle as well as to keep your nails in tiptop shape.

Here are 10 straight forward signs that it is time for a new set:
You notice that you’re feeling tempted to bite and crack your nails off with your teeth because they’re feeling irritated, dry and brittle.
Cuticle oil is no longer helping with number one.
Your natural nails underneath your acrylics are starting to peel away from the acrylic or nail tips.
Your natural nails underneath your acrylics are yellowing or discoloured.
Food and dirt are getting trapped between your natural nails and acrylic or nail tips.
You notice multiple weak spots such as cracks and chips.
You have had to repair two or more nails within a short period of time.
You can see multiple infill lines within your nail designs.
You dislike your current set.
None of the above but you simply feel, or just know, that it is time for a new set.
Hand & Nail Must-Haves
Rings (jewellery)
Fly-Girl Notes
Fly-girl, it-girl, city-girl, note #1:

Put your plastic carry bags (even valuable items when in dodgy areas) inside of a trendy canvas bag.
Put multiple bags inside of a suitcase with sturdy wheels or a trolley. No Hunnie, trolleys are not for “grannies”, trolleys are for trendy girlies who work smarter and not harder! Choose trolleys that have sturdy wheels and robust velcro/zipper/drawstring fixings. Choose a colour or print that goes with everything! The colour black is a professional multi-industry colour choice.
Shop in Style
Period Woes?
‘Uh-oh, uh-oh, uh-oh, oh, no, no’

Stay confident, comfortable and prevent leaks:
Discreet sanitary napkin disposable hygiene bags (put a few into your discreet sanitary napkin storage pouch). Wrapping with toilet paper can work just as well.
Discreet sanitary napkin storage pouch for your handbag or school bag.
Fragrance of your choice.
Black undies with a snug fit help to prevent shifting during walking, running, movement etc.
Black boy shorts with a snug fit to go over undies for extra protection and discreetness (hides sanitary napkin wings) which prevents shifting and leaking during walking, running, movement etc.
Sanitary napkins with wings are best for preventing shifting which leads to leaks.
Pantyliners aka Dailies, are the best option for staying comfortable leading up to and after a period.
Flushable wipes are optional but always wipe down and underneath the toilet seat, and flush good.
In my Bag
I got hot sauce in my bag, swag! But, my Virgo Ascendant + Virgo Moon keep me organized and with my health always in mind.

Cosmetic case (with my favourite cosmetics)
Face mask + sanitary case + pair of disposable gloves
Hand sanitizer
Pocket tissue + waste bag
Mini notebook with pen/pencil
Leather/warm gloves (winter season)
Unbreakable flat water bottle (slides into bag)
Yes! Everything matches!
Chris in the City, Tear Sheet
Creative muse musings:
Food is Bae
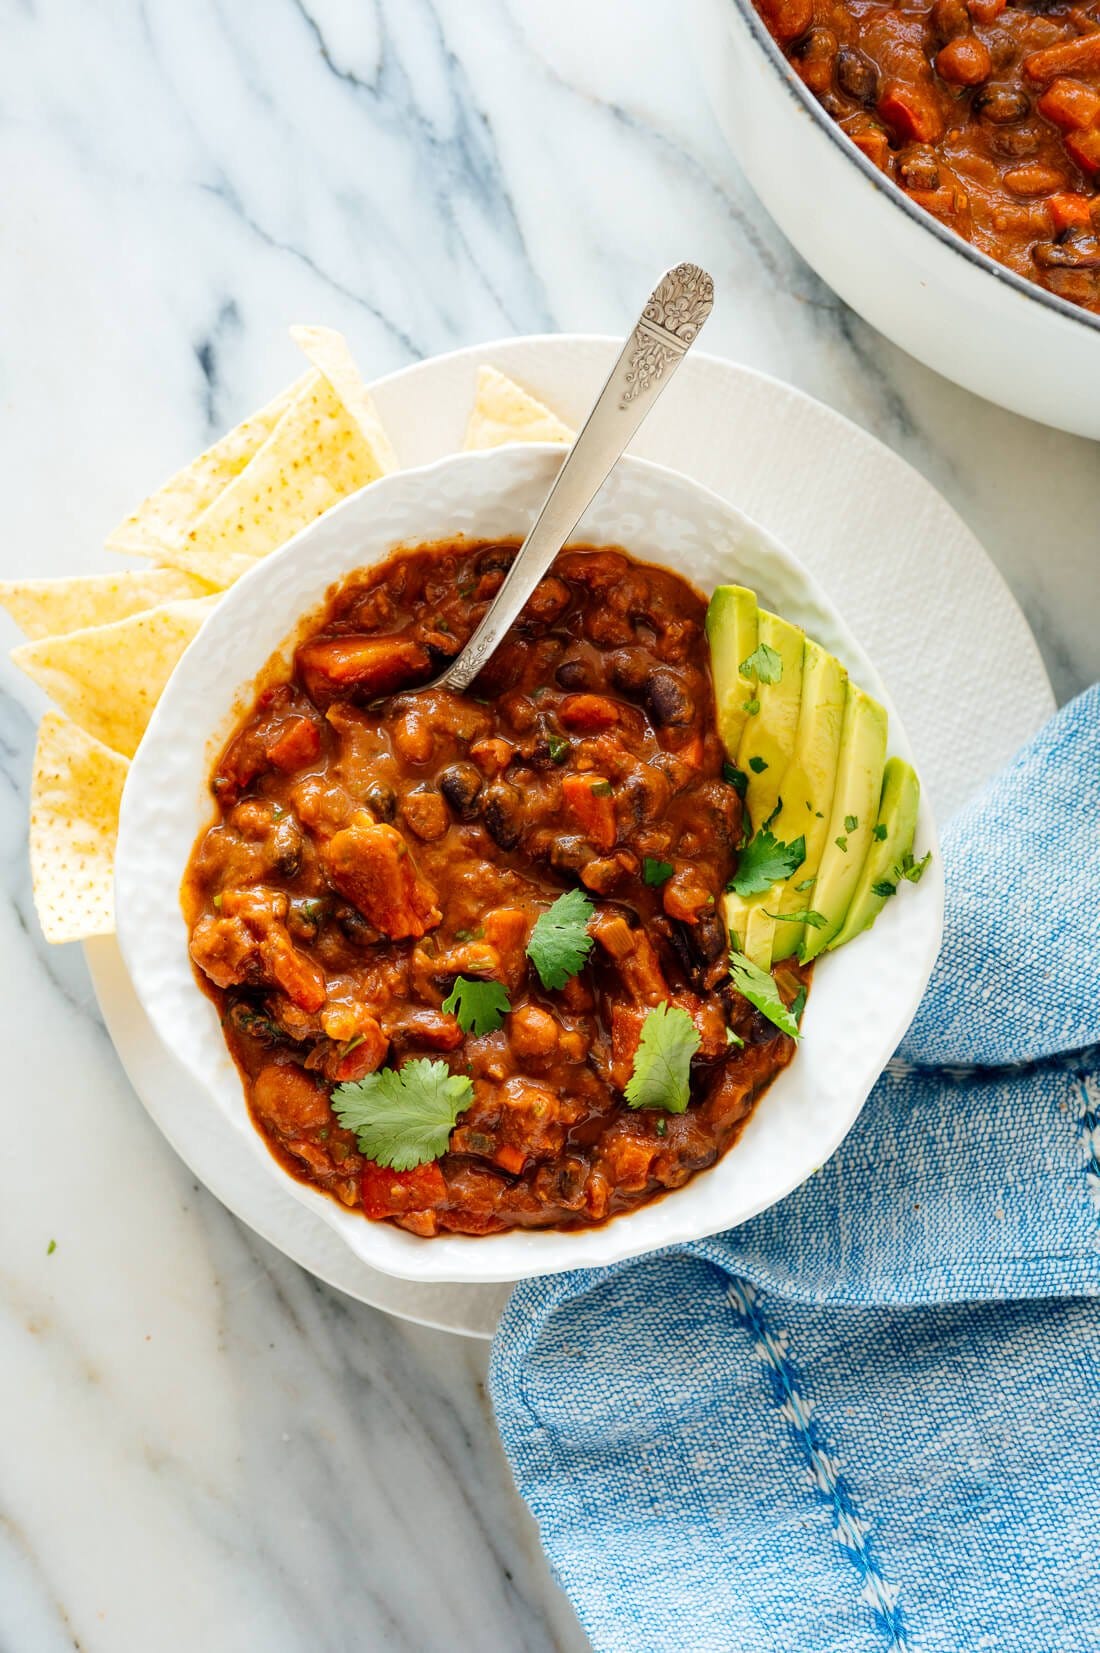
Homemade Vegetable Chili (Student friendly)
Healthy, hearty, easy one pot stews, soups and meals come in handy for busy mamas, time starved adults, students on a budget, and of course, times of crisis which includes illness. This ‘Food is Bae’ section is dedicated to all of you. Tinned foods are non-perishable grocery/emergency essentials. Tinned and frozen foods are healthy options that cut back on food waste and also offer convenience by cutting back on your cooking time. Without further ado, follow the recipe below:
Ingredients
2 tablespoons extra-virgin olive oil
1 medium red onion, chopped
1 large red bell pepper, chopped
2 medium carrots, chopped
2 ribs celery, chopped
½ teaspoon salt, divided
4 cloves garlic, pressed or minced
2 tablespoons chili powder*
2 teaspoons ground cumin
1 ½ teaspoons smoked paprika*
1 teaspoon dried oregano
1 large can (28 ounces) or 2 small cans (15 ounces each) diced tomatoes**, with their juices
2 cans (15 ounces each) black beans, rinsed and drained
1 can (15 ounces) pinto beans, rinsed and drained
2 cups vegetable broth or water
1 bay leaf
2 tablespoons chopped fresh cilantro, plus more for garnishing
1 to 2 teaspoons sherry vinegar or red wine vinegar or lime juice, to taste
Garnishes: chopped cilantro, sliced avocado, tortilla chips, sour cream or crème fraîche, grated cheddar cheese, etc.
Instructions
In a large Dutch oven or heavy-bottomed pot over medium heat, warm the olive oil until shimmering. Add the chopped onion, bell pepper, carrot, celery and ¼ teaspoon of the salt. Stir to combine and cook, stirring occasionally, until the vegetables are tender and the onion is translucent, about 7 to 10 minutes.
Add the garlic, chili powder, cumin, smoked paprika and oregano. Cook until fragrant while stirring constantly, about 1 minute.
Add the diced tomatoes and their juices, the drained black beans and pinto beans, vegetable broth and bay leaf. Stir to combine and let the mixture come to a simmer. Continue cooking, stirring occasionally and reducing heat as necessary to maintain a gentle simmer, for 30 minutes.
Remove the chili from the heat and discard the bay leaf. For the best texture and flavor, transfer 1 ½ cups of the chili to a blender, making sure to get some of the liquid portion. Securely fasten the lid and blend until smooth (watch out for hot steam), then pour the blended mixture back into the pot. (Or, you can blend the chili briefly with an immersion blender, or mash the chili with a potato masher until it reaches a thicker, more chili-like consistency.)
Add the chopped cilantro, stir to combine, and then mix in the vinegar, to taste. Add salt to taste, too—I added ¼ teaspoon more at this point. Divide the mixture into individual bowls and serve with garnishes of your choice. This chili will keep well in the refrigerator for about 4 days or you can freeze it for longer-term storage.
Recipe credit: Cookie and Kate
Gotta have It!
-xx Chris xx-